How to Replace the Fuel Cap on Freightliner Trucks
How to Replace the Fuel Cap on Freightliner Trucks
Fuel caps on Freightliner trucks are crucial components that often go unnoticed in regular maintenance checks. They not only ensure that your fuel system is sealed properly but also help maintain fuel pressure and prevent contaminants from entering the fuel tank. If your fuel cap is damaged, broken, or not sealing properly, it can lead to fuel leaks, poor fuel economy, or even the triggering of the “Check Engine” light. In this blog post, we’ll walk you through the simple process of replacing the fuel cap on your Freightliner truck to keep your vehicle running smoothly.
Why You Need to Replace the Fuel Cap
Before diving into the replacement process, it’s important to understand why the fuel cap is essential:
- Prevents Fuel Evaporation: The fuel cap helps maintain the proper pressure in the fuel system, reducing the risk of fuel evaporation.
- Prevents Contaminants: A properly sealed fuel cap keeps dirt, water, and debris from entering the fuel tank, which can damage the engine or fuel system.
- Fuel Economy: A damaged or poorly sealing fuel cap can cause a loss of pressure in the fuel system, leading to decreased fuel efficiency.
- Avoiding Check Engine Light: A faulty fuel cap is a common reason why the “Check Engine” light illuminates on your dashboard.
If you’ve noticed any of these symptoms, it’s time to replace your Freightliner truck’s fuel cap.
Tools and Materials You’ll Need
Replacing the fuel cap on a Freightliner truck is a simple task that requires minimal tools. Here’s what you’ll need:
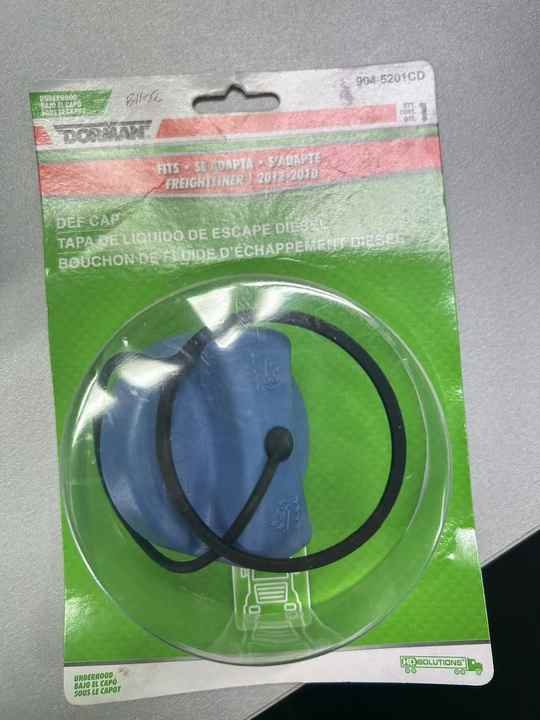
- Replacement fuel cap (make sure it’s compatible with your Freightliner model)
- A clean rag or cloth (optional, for cleaning the fuel area)
- Hand gloves (optional, for protection)
Steps to Replace the Fuel Cap
- Turn Off the Engine and Park Safely
Before working on any part of your truck’s fuel system, ensure that the engine is turned off, and the truck is parked on a flat surface. This will prevent fuel spillage and ensure safety during the replacement. - Locate the Fuel Cap
Depending on the model of your Freightliner truck, the fuel cap is typically located on the side of the vehicle near the fuel tank. On most Freightliner models, the fuel cap is located on the driver’s side. - Inspect the Old Fuel Cap
Before removing the old fuel cap, inspect it for signs of wear and damage. Look for cracks, broken seals, or corrosion around the threads. If the cap feels loose, doesn’t seal tightly, or is visibly damaged, it’s time for a replacement. - Remove the Old Fuel Cap
To remove the old fuel cap, simply twist it counterclockwise. Depending on the model, the cap may come off with a few turns. If it is stuck, gently wiggle it or use a cloth to get a better grip. Be cautious not to force it too hard, as this could damage the cap or the fuel door. - Clean the Fuel Neck
Once the fuel cap is removed, use a clean rag or cloth to wipe down the area around the fuel neck. This step is optional but helps to ensure there’s no dirt, dust, or debris that might get into the fuel tank when the new cap is installed. - Install the New Fuel Cap
Take the replacement fuel cap and align it with the fuel neck. Turn it clockwise until it is snug and securely fastened. Most fuel caps make a clicking sound when they are tightly sealed, indicating that the cap is on correctly. - Double-Check for a Proper Seal
After the new fuel cap is installed, check to make sure it is properly sealed. You should feel resistance as you tighten the cap, and it should not wiggle or come off easily. If the fuel cap doesn’t seal properly, it may lead to fuel leaks or trigger the “Check Engine” light. - Test for Leaks
If possible, start your engine and check for any unusual smells or visible signs of fuel leakage around the fuel cap. If you notice anything unusual, turn off the engine immediately and double-check the cap to ensure it’s sealed properly.
Tips for Maintaining Your Fuel Cap
- Regularly Inspect: Even though the fuel cap is durable, it’s a good idea to check it regularly for signs of wear, cracks, or rust. This can help you catch problems early and prevent costly repairs.
- Avoid Over-tightening: While it’s important to make sure the cap is secure, over-tightening can cause damage to the threads or seals. Tighten the cap until it clicks, but don’t go beyond that.
- Keep It Clean: The area around the fuel cap should be kept clean to prevent dirt or water from contaminating the fuel tank.
Conclusion
Replacing the fuel cap on your Freightliner truck is a quick and easy task that can help prevent fuel leaks, improve fuel efficiency, and prevent the “Check Engine” light from coming on. By following the steps outlined above, you can ensure that your Freightliner truck continues to run smoothly and reliably. If you’re ever in doubt about the replacement process or need assistance, don’t hesitate to consult your truck’s owner manual or visit a trusted mechanic for guidance.
Taking care of the small details, like the fuel cap, can make a big difference in the long-term performance of your Freightliner truck. Stay proactive with maintenance, and your truck will thank you with better performance and longevity.